
Claude Code CC Switch Graphical Configuration Tutorial
Claude Code natively determines where requests are sent through the two environment variables ANTHROPIC_BASE_URL and ANTHROPIC_AUTH_TOKEN. Pointing them to Ace Data Cloud allows you to use Claude Code at a lower price without an official Anthropic subscription. Manually editing .claude/settings.json is not user-friendly for beginners, while CC Switch provides a graphical interface that helps you set these two variables with one click and switch between multiple vendors instantly.
This article explains how to connect Claude Code to Ace Data Cloud using CC Switch.
¶ What is CC Switch
CC Switch (official website ccswitch.io) is an open-source, cross-platform desktop configuration manager used to manage vendor configurations for multiple AI programming tools such as Claude Code, Claude Desktop, Codex, Gemini CLI, OpenCode, OpenClaw, and Hermes. It is built on Tauri 2 and is open-sourced under the MIT license, having received over 110,000 stars on GitHub (see farion1231/cc-switch).
Its core value lies in (see the official User Manual for details):
- No manual configuration changes: No need to manually write
settings.json/config.toml/.env, just fill it out once in the graphical interface. - One-click switching: Pre-store multiple vendors and switch instantly from the main interface or system tray.
- Atomic writing: All data is stored in a local SQLite database (
~/.cc-switch/cc-switch.db), using "temporary file + rename" atomic writing to avoid configuration corruption.
The working principle of CC Switch is to dynamically override Claude Code's
ANTHROPIC_BASE_URLandANTHROPIC_AUTH_TOKENat the underlying level, redirecting requests originally sent to Anthropic's official servers to the third-party interface you configured (in this case, Ace Data Cloud). This mechanism is also detailed in the community's graphic tutorial.
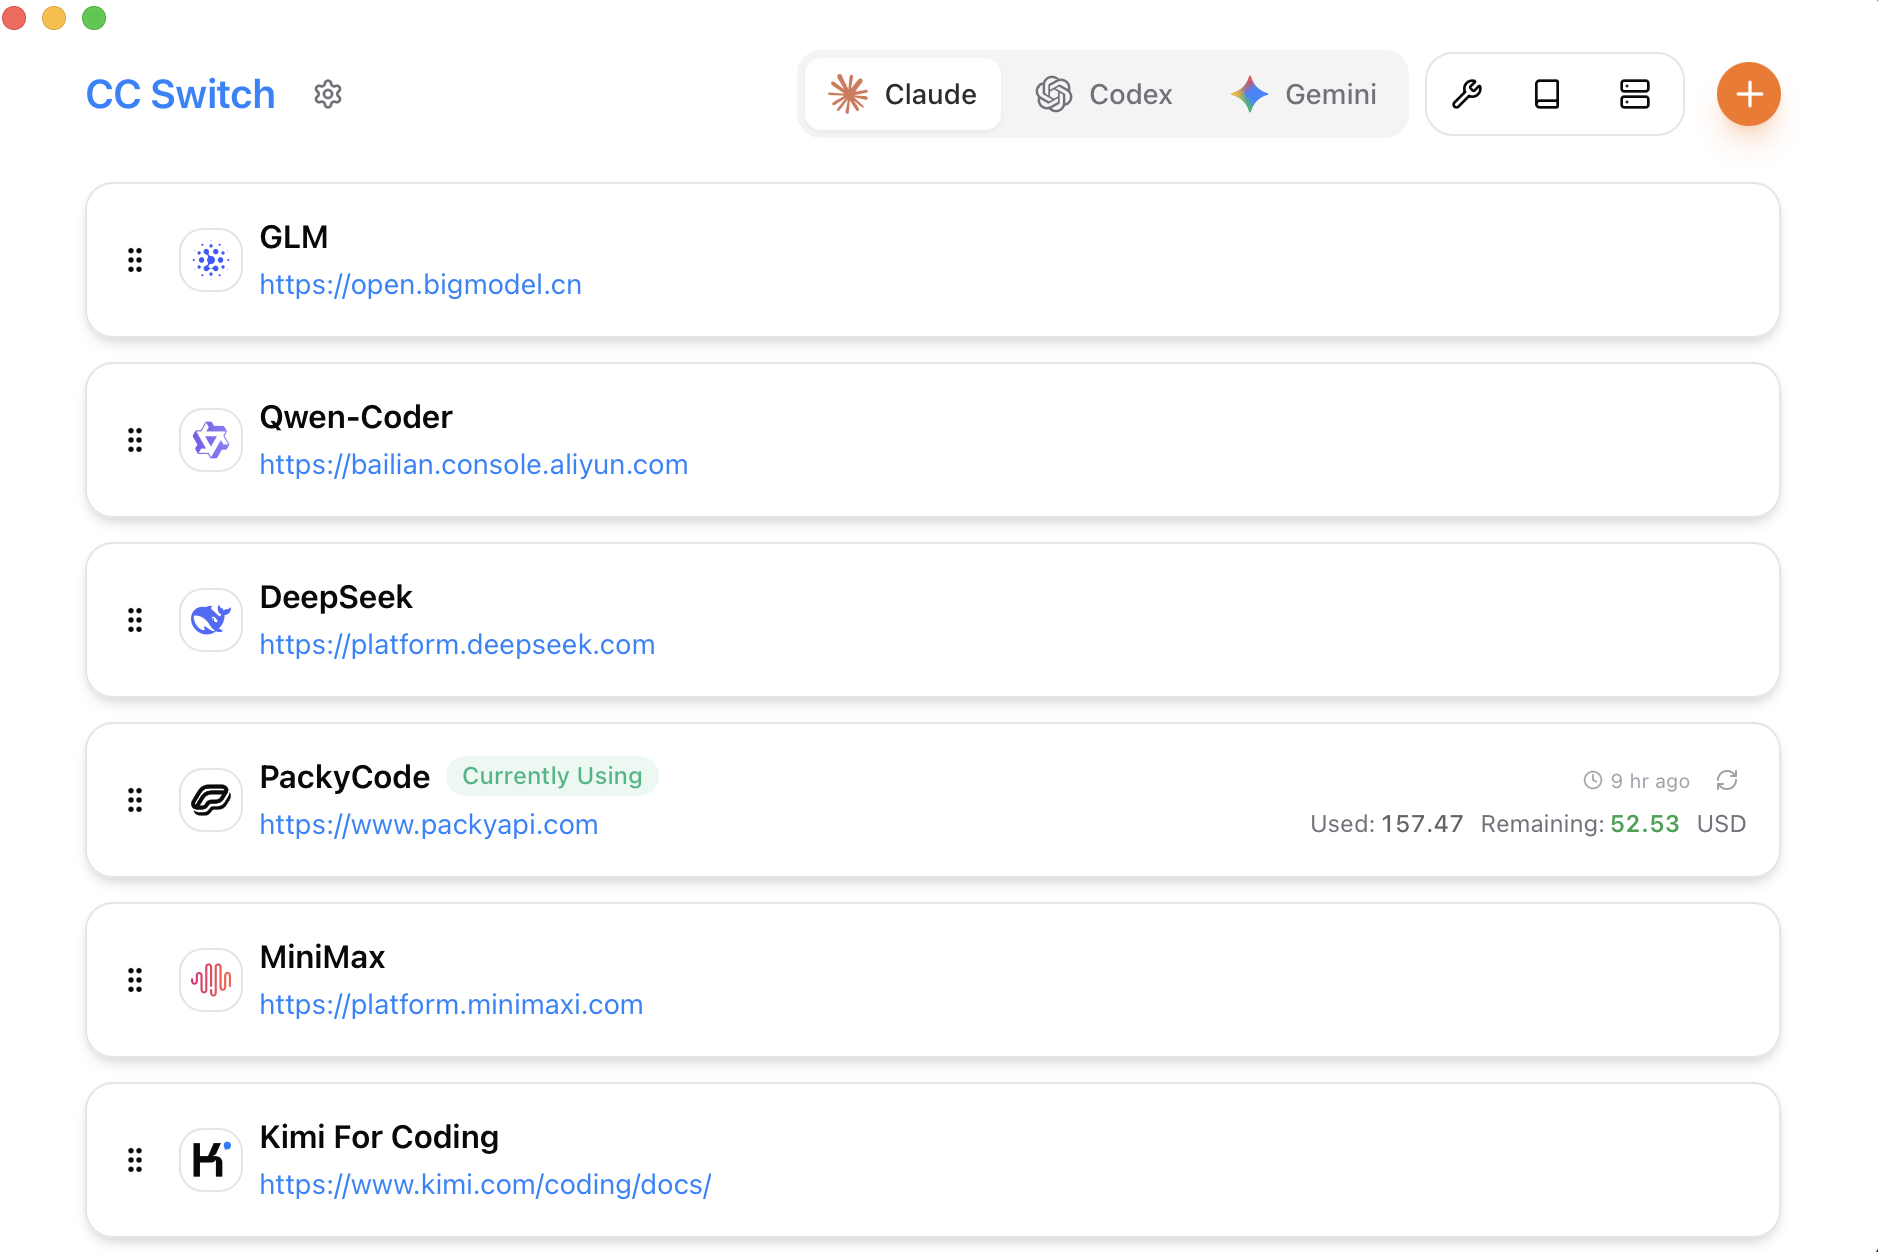
The official main interface of CC Switch and the "Add Provider" panel are as follows (screenshots from CC Switch official repository):
¶ Apply for API Token
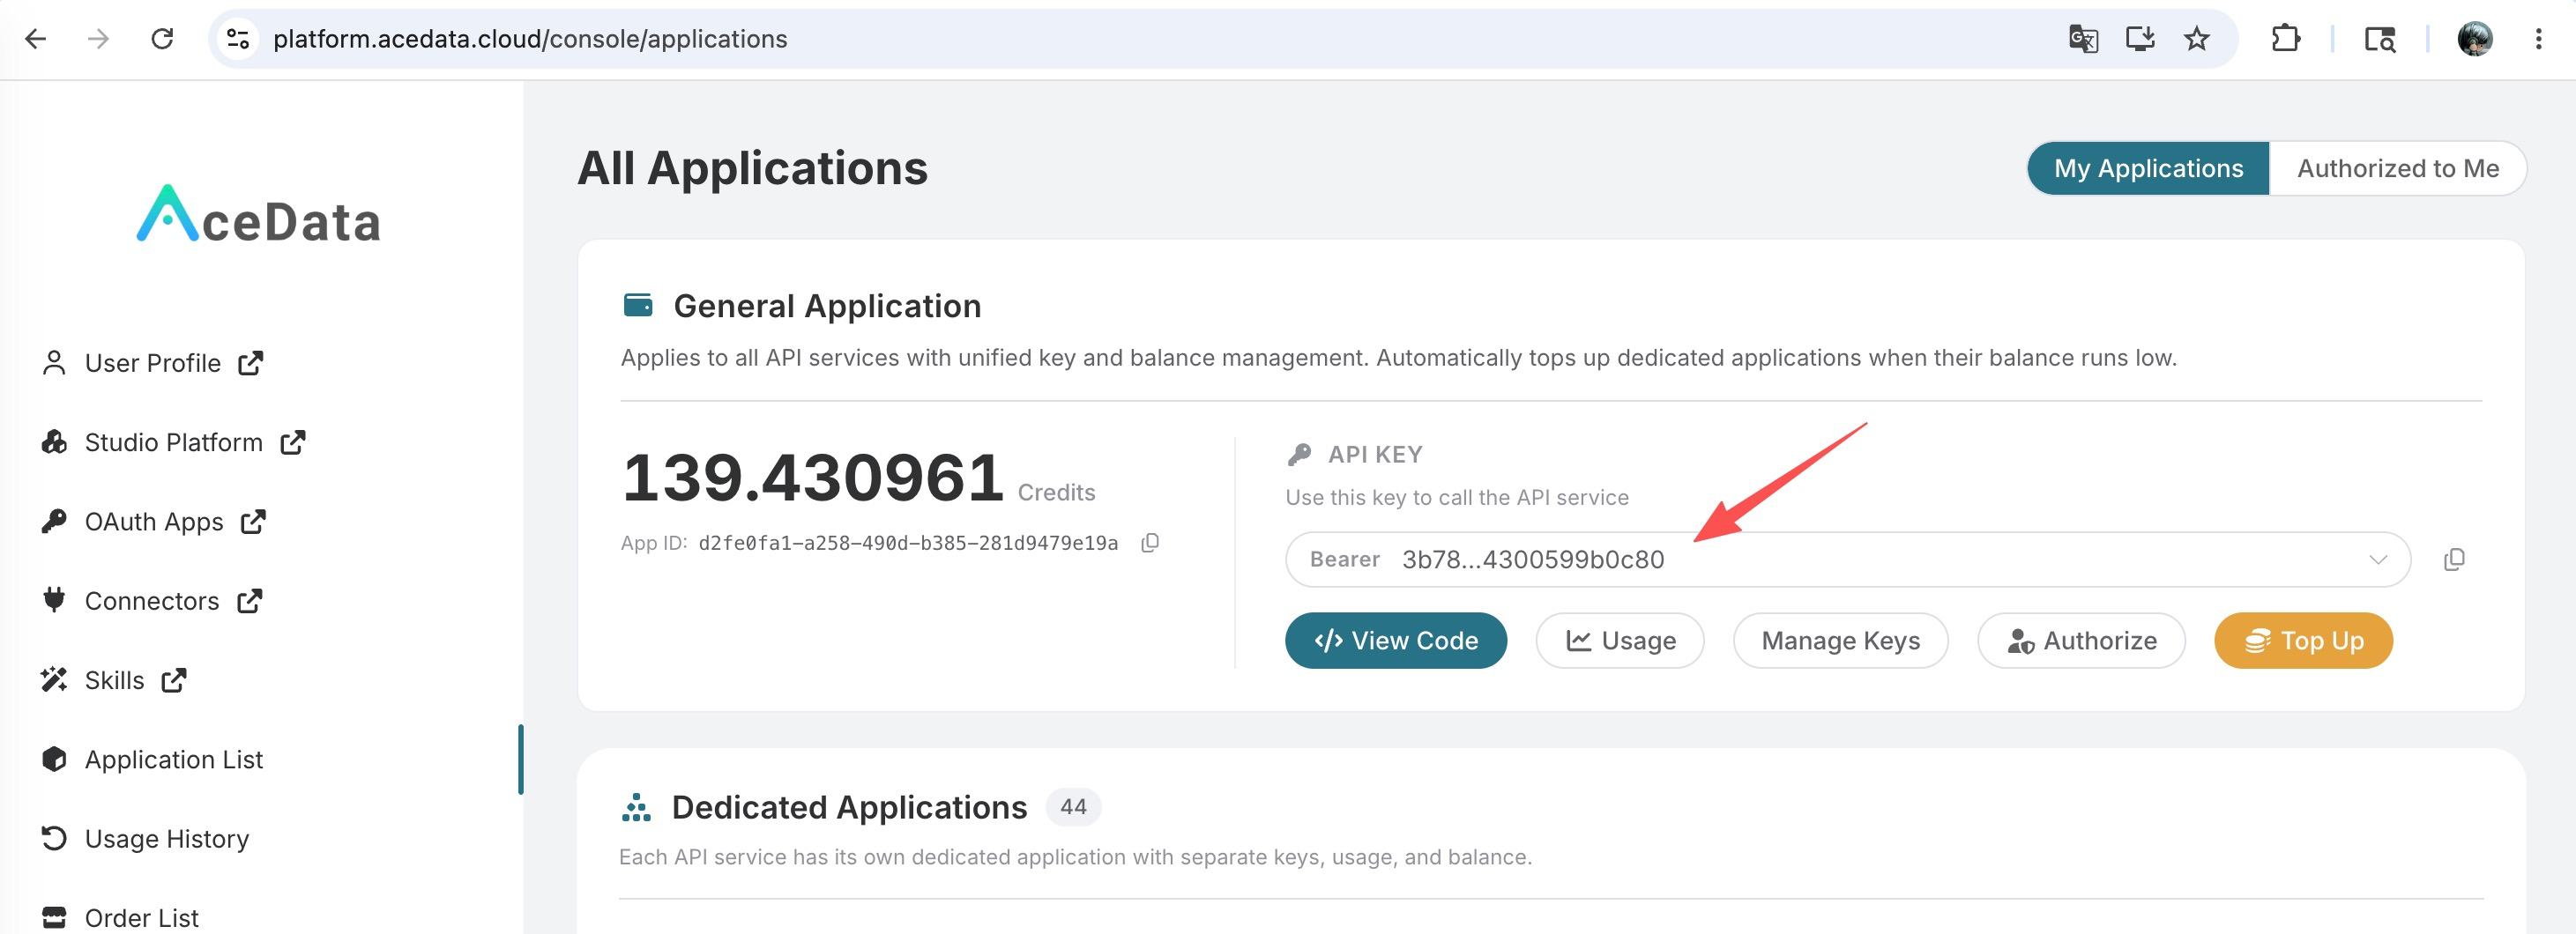
To use Claude Code, first go to the Ace Data Cloud Console to obtain your API Token for backup.
If you are not logged in or registered, you will be automatically redirected to the login page inviting you to register and log in. After logging in or registering, you will be automatically returned to the current page. When applying for the first time, there will be a free quota gift, allowing you to experience Claude Code services for free.
Tip: You can also go to the Claude Messages service page and click "Acquire" to get the credentials, which also grants a free quota; if the quota is insufficient, you can recharge in Console - General Balance.
¶ Download and Install CC Switch
Go to the CC Switch Releases page (or directly download the latest version) and choose the corresponding installation package based on your operating system. The following installation methods are from the official README:
| Operating System | System Requirements | Installation Method |
|---|---|---|
| Windows | Windows 10 and above | Download CC-Switch-v{version}-Windows.msi installer or -Windows-Portable.zip portable version |
| macOS | macOS 12 (Monterey) and above | Recommended brew install --cask cc-switch, or download .dmg (signed and notarized by Apple, can be opened directly) |
| Linux | Ubuntu 22.04+ / Debian 11+ / Fedora 34+ | Download .deb / .rpm / .AppImage; Arch users can use paru -S cc-switch-bin |
After installation, launch CC Switch and prepare to add a vendor.
On the first launch, CC Switch can import your existing CLI configuration as the default vendor (see the official Quick Start) to avoid overwriting existing configurations.
¶ Add Ace Data Cloud Vendor
CC Switch has over 50 built-in vendor presets, but currently does not include Ace Data Cloud, so we will use the "Custom" method to add it. The following steps correspond to the official documentation 2.1 Add Provider.
- Switch to the Claude Code application at the top of CC Switch.
- Click the + (Add Provider) button in the upper right corner to open the add panel, and operate under the App-specific Provider tab.
- Select Custom from the preset dropdown, then fill in the configuration.
The official CC Switch "Add Provider" panel is as follows (screenshot from CC Switch official repository):
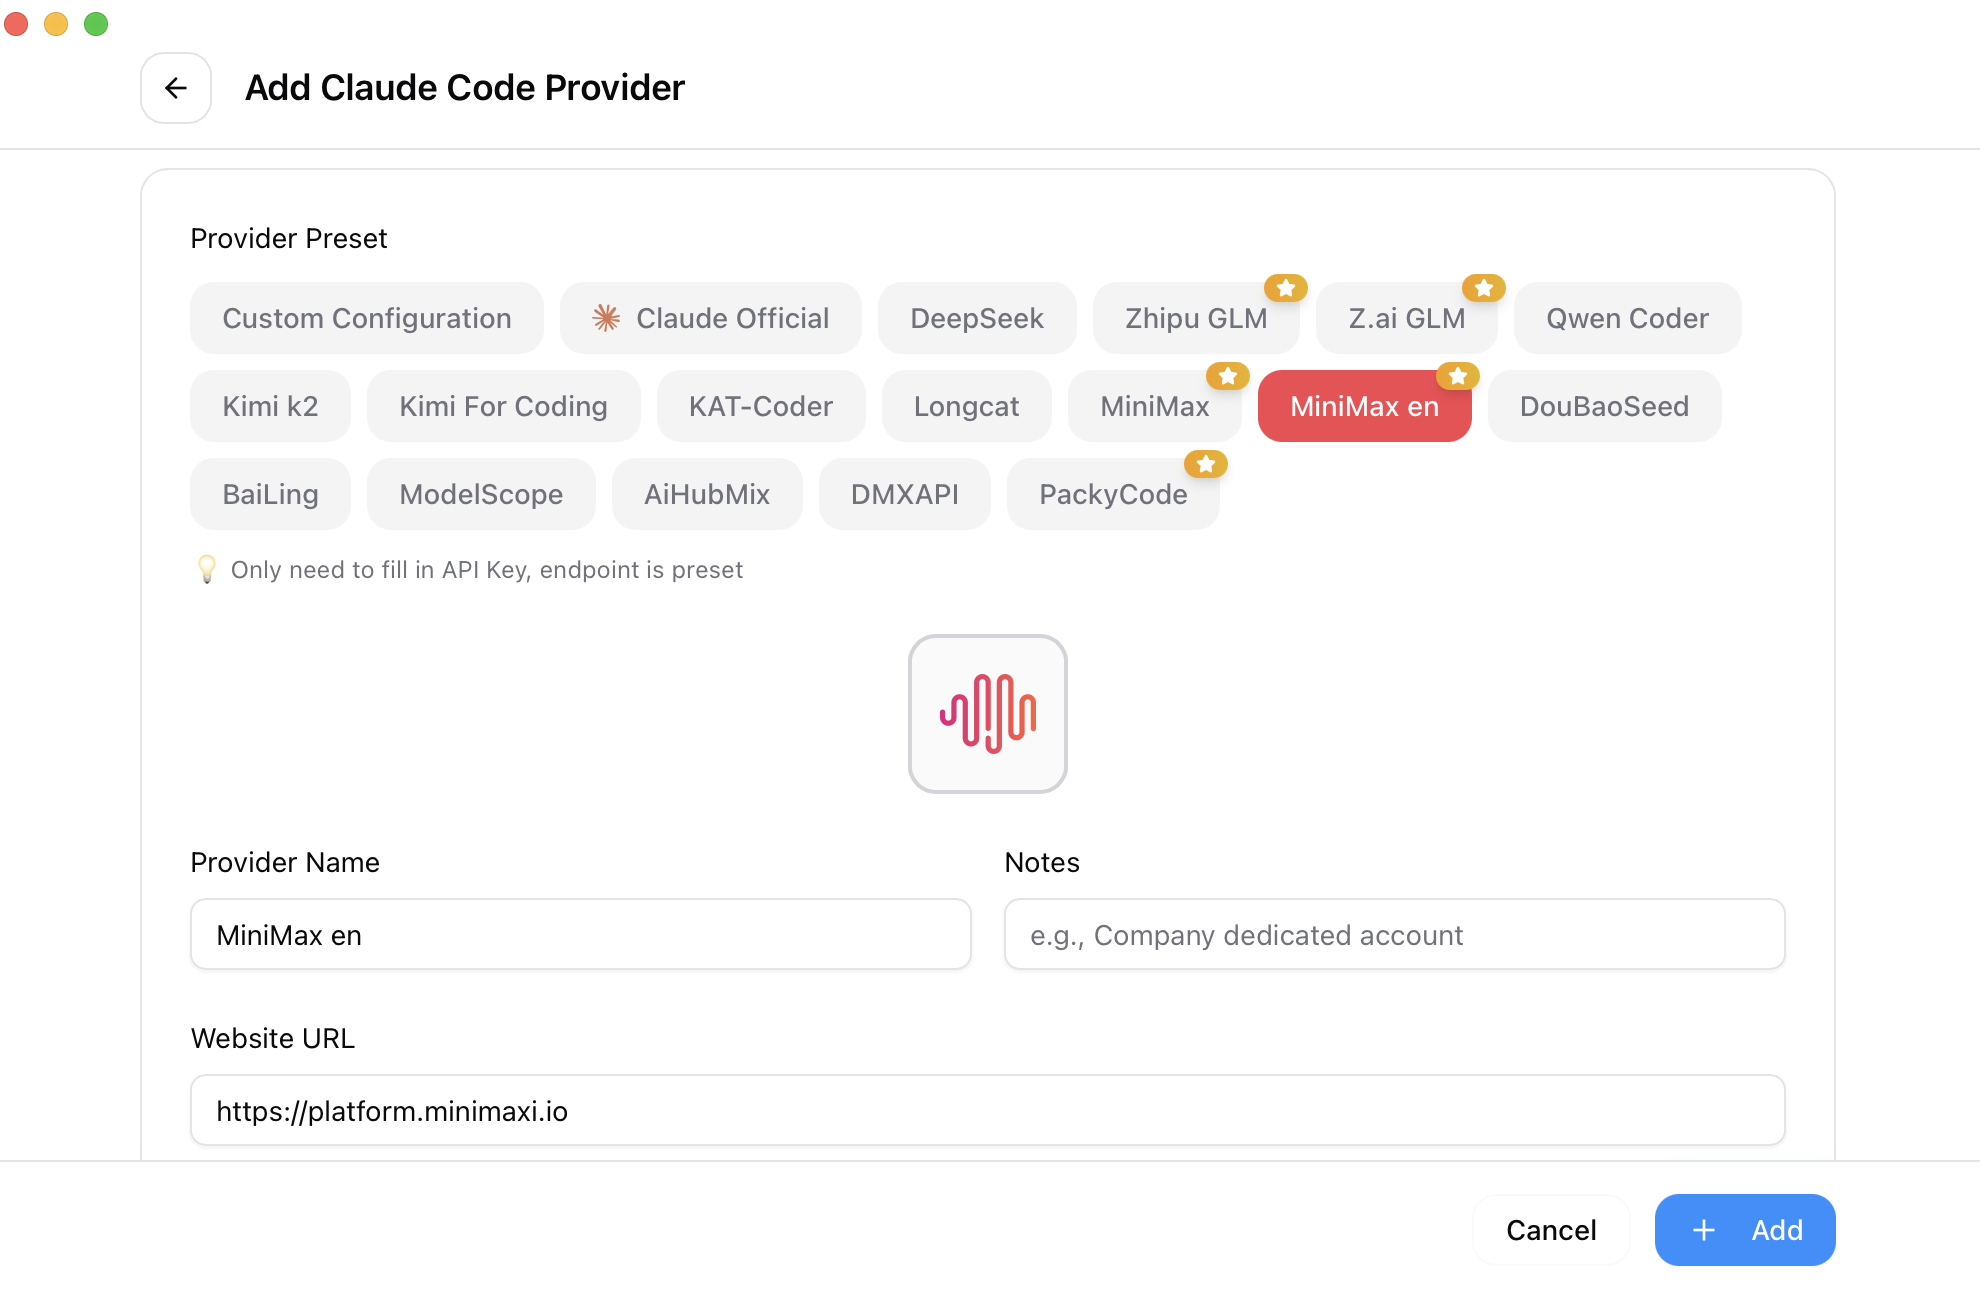
Fill in the following information:
| Field | Content to Fill |
|---|---|
| Name | Ace Data Cloud (customizable) |
| Base URL | https://api.acedata.cloud |
| API Key / Token | The API Token you copied from the console |
After selecting Custom, you can also directly fill in the Claude configuration in the JSON editing box. Ace Data Cloud provides a proxy that is natively compatible with the Anthropic Messages API, so you can use the default ANTHROPIC_* environment variables (see the official Claude Configuration Format for configuration format):
{
  "env": {
    "ANTHROPIC_AUTH_TOKEN": "{token}",
    "ANTHROPIC_BASE_URL": "https://api.acedata.cloud"
  }
}
Replace {token} with the API Token you copied from the Ace Data Cloud console. After verifying that everything is correct, click Add to complete the addition.
API Format (Advanced Options): Ace Data Cloud uses the native Anthropic Messages protocol, so keep the default API Format as Anthropic Messages in the advanced options, without needing to enable local routing or format conversion.
- In the CC Switch "Add Provider" panel, Name = Ace Data Cloud, Base URL = https://api.acedata.cloud, API Key has been filled in with the status of ADC Token;
- In the Claude Code provider list, the Ace Data Cloud card is in the "Enabled" state.
¶ Enable and Switch Provider
After adding, find the Ace Data Cloud card in the Claude Code provider list and click Enable (refer to the official 2.2 Switch Provider). You can also click the provider name directly from the system tray menu for instant switching without opening the full interface.
Is a restart needed? According to the official FAQ, Claude Code supports "hot switching" — switching providers takes effect without needing a restart; most other tools (like Codex, Gemini CLI) require restarting the corresponding CLI or terminal.
When CC Switch enables a provider, it writes the above configuration into Claude Code's configuration file (user-level ~/.claude/settings.json). Therefore, whether you run claude in the terminal or use the Claude Code extension in VS Code, the same configuration will be read. For the location and format of the configuration file, refer to the official 5.1 Configuration File Description.
¶ Using in Terminal and VS Code
CC Switch is only responsible for writing the configuration; the Claude Code itself still needs to be installed separately. After enabling the provider:
- Terminal CLI: Install and run
claude, complete steps can be found in the Claude Code Terminal Configuration Tutorial. After entering the interactive interface, type/status, and you should seeAnthropic base URL: https://api.acedata.cloud.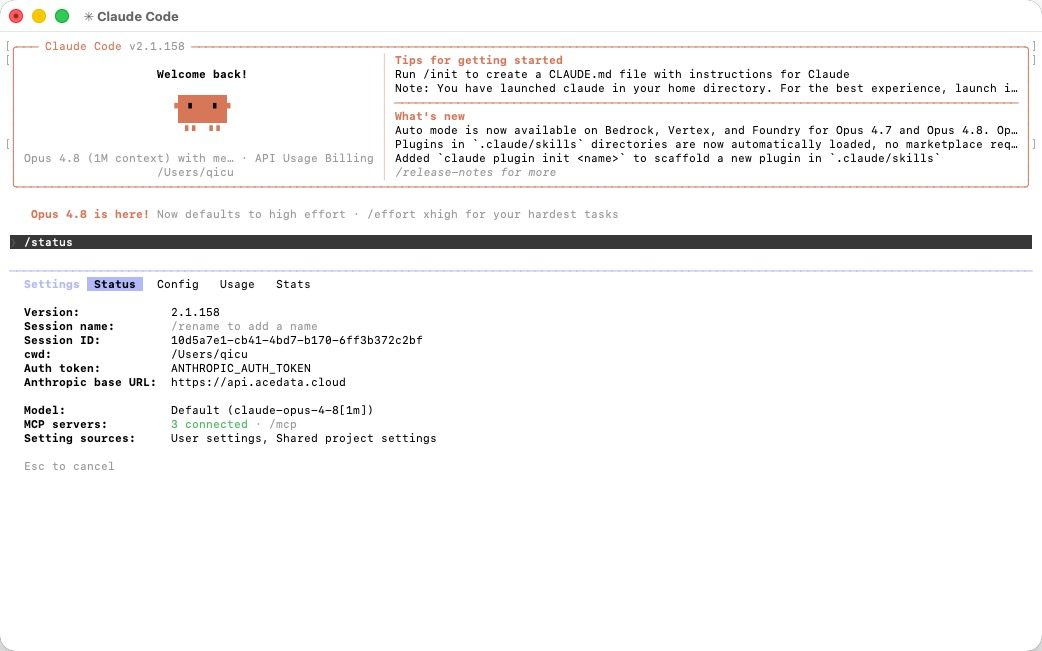
- VS Code Extension: Install the Claude Code extension from the extension marketplace, complete steps can be found in the Claude Code VS Code Configuration Tutorial. Since the extension and CLI share the same configuration, once CC Switch is set up, the VS Code extension will directly reuse it without needing to fill it in manually.
- GitHub Actions: If you want to use it in CI/CD, refer to the Claude Code GitHub Actions Configuration Tutorial (this scenario injects variables through Secrets, typically not using CC Switch).
¶ Remote Development (Remote - SSH)
If you are developing on a remote server via VS Code Remote - SSH, the remote side cannot read your local environment variables. At this point, you can use the Local Proxy feature of CC Switch: after enabling the local proxy in CC Switch, it will listen on a port on your local machine and forward requests; then use SSH's RemoteForward to forward that port to the remote host, allowing the remote Claude Code to reuse the local provider. For the configuration description of the local proxy, refer to the official 4.1 Proxy Service, and for the complete graphical steps of Remote - SSH, refer to the community tutorial Golden-Promise/vscode-cc-switch.
¶ Check Quota and Usage
- Check the current account's remaining quota through the Ace Data Cloud Console - Application List.
- Check all request records and billing details through the Ace Data Cloud Console - Usage History.
¶ Frequently Asked Questions
- Why can't I delete the currently used provider? CC Switch follows the principle of "minimal intrusion," always retaining one enabled configuration to avoid the CLI tool becoming unusable after deleting all configurations. See the official FAQ for details.
- How to switch back to the official login? Add an official login provider from the preset list, and after switching, follow the official login / OAuth process (refer to the official Quick Start).
- Where is the configuration data stored? Provider, MCP, Prompts, Skills, and other data are stored in
~/.cc-switch/cc-switch.db(SQLite), device-level UI preferences are stored in~/.cc-switch/settings.json, and automatic backups are located in~/.cc-switch/backups/(refer to the official FAQ).
¶ Reference Sources
- CC Switch project repository: https://github.com/farion1231/cc-switch
- CC Switch official website: https://ccswitch.io/
- CC Switch user manual: https://github.com/farion1231/cc-switch/blob/main/docs/user-manual/en/README.md
- Add Provider (2.1 Add Provider): https://github.com/farion1231/cc-switch/blob/main/docs/user-manual/en/2-providers/2.1-add.md
- Switch Provider (2.2 Switch Provider): https://github.com/farion1231/cc-switch/blob/main/docs/user-manual/en/2-providers/2.2-switch.md
- Local Proxy (4.1 Proxy Service): https://github.com/farion1231/cc-switch/blob/main/docs/user-manual/en/4-proxy/4.1-service.md
- Community graphical tutorial (VS Code + cc-Switch): https://github.com/Golden-Promise/vscode-cc-switch
- Claude Code official VS Code documentation: https://code.claude.com/docs/en/vs-code
- Ace Data Cloud Claude Messages service: https://platform.acedata.cloud/documents/claude-messages